So What’s Next?
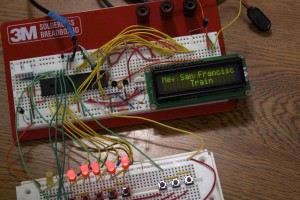
Okay, so we’ve got working hardware, and it’s surprisingly useful. The breadboarded version has been on my desk for a few days now, and I’ve found myself using it to control iTunes as a natural impulse (strangely, I haven’t done much with ratings – but the pause/play button is handy). This makes me happy; now all I need is a finalized version on something nicer than a breadboard.
Time to have a board etched!
This is actually going to be something of an adventure. I’ve historically used ExpressPCB for boards (they’re surprisingly inexpensive), but this time I wanted to do it with EAGLE, which ruled them out since they don’t do Gerber. There are a lot of board houses out there; it was hard to choose one.
In the end I settled on Advanced Circuits. Their FreeDFM service already caught a few minor things that likely saved me some time, and now I’m waiting for my boards to get here (they should show up later today, actually). I’ll refrain from further comment until then; the proof will be in the pudding.
Why not BatchPCB or similar? Because I was impatient, that’s why.
This will be the first real surface-mount project I’ve done. Only one board I’ve made has had a surface mount component of any kind on it, and that was a single 8-pin TSSOP (couldn’t find it in through-hole, so I bit the bullet). 40-pin DIPS are huge, though, and I want this thing to be reasonably compact, so surface mount it is.
So the board is ordered, along with a hoof tip for my soldering station (Hakko T18-compatible tip, made by Plato, to be used on a Xytronic 379 cheapo iron). Oh, and solder. And flux.
I’m kinda excited to try drag soldering, though I may well destroy the first board. I’m not all that good at soldering in general; I have absolutely no idea how this’ll turn out.
So I’ll be building the final toy soon. If everything goes well (which I’m hoping it will), the next step will be putting together some kind of enclosure for it. At the moment I’m considering laser-cut acrylic through someone like Ponoko, though I may have to make the top face laser- or waterjet-cut aluminum due to thickness requirements.
Stay tuned to see what happens.
Of course, the other day I was poking around somewhere and discovered that the USB chip on the Arduino Uno is, in reality, an ATmega16U2 that can easily be reprogrammed to do USB HID – or whatever else you want, for that matter. Go figure. All this work that I didn’t even need to do…
Too late now!
S.


Pingback: Overbuilding an iTunes rating system - Hack a Day
Pingback: Overbuilding an iTunes rating system « Hackaday « Cool Internet Projects
Pingback: Overbuilding an iTunes rating system | ro-Stire
Pingback: Overbuilding an iTunes rating system | ro-Stire
nice post
Pingback: Overbuilding an iTunes rating system | CisforComputers
Pingback: Overbuilding an iTunes rating system » Geko Geek
I really appreciate a website that links its thumbnails to their full-size counterparts. It’s nice….
I hate being sent to some stupid image-sharing service to see the full size…. Ten clicks later…. Oh.. I’m not interested any more..!